Total time needed: 30 minutesI have a lot of friends that run their own blogs. A lot of them do really well. Having your own blog is such a great thing and comes with a host of benefits. You can say exactly what you want to say - and find people that enjoy hearing you say exactly that in exactly that way; you can connect with people in a way that just isn't possible through Facebook, Twitter, Instagram, Snapchat or any other social media presence. Unfortunately - having your own blog also comes with a set of new problems - like what to write about, what platform to use (Wordpress, Drupal, Squarespace, Wix), how to keep track of your fans, how to keep track of your website analytics, and often times, how to make money.If you haven't even set up your website yet - you will want to read this post to help you figure out which CMS (Content Management System) will work best for you (COMING SOON).Once you have your website set up, and you have added Google Analytics, you will want to get Google Webmaster Tools set up. Why? Because it can give you a boost in SEO (Search Engine Optimization), which we will cover later, plus once you've set up your google analytics custom reports they can give you some other really good insights into the traffic that is coming to your website - different than Google Analytics - and it's free - which is a pretty sweet deal.
Step 1. Sign up for a Google Account
If you already have a Gmail address - then you can just use that. If you don't - go to google.com and click on "+you" in the upper right hand corner.

Step 2. Set up your Google Webmaster Tools account
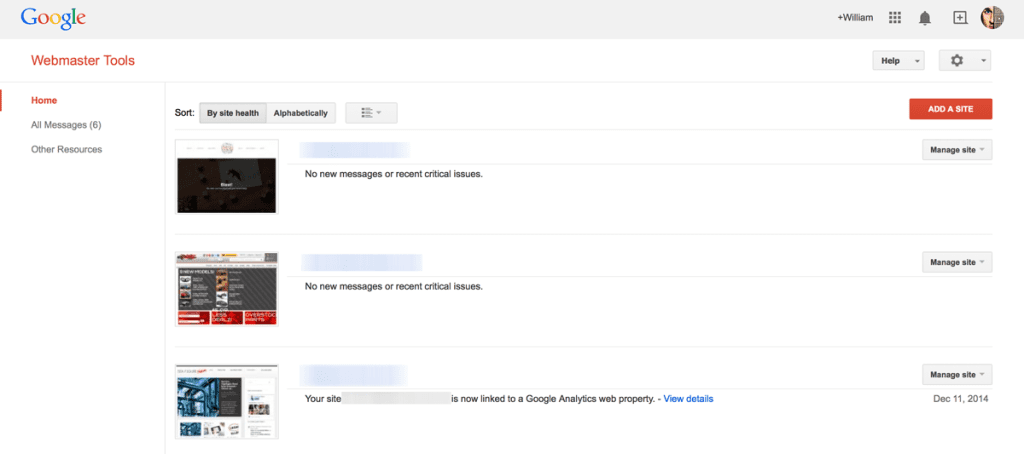
To sign up - go to: https://www.google.com/webmasters/tools/ - then simply sign in using the Google Account you just created - you still remember your password right?The first thing you will want to do once you are signed in, is click the red button that says, "add a site". A prompt will open up asking you for the URL of your website. Type that in and hit enter. Then you will see this screen.

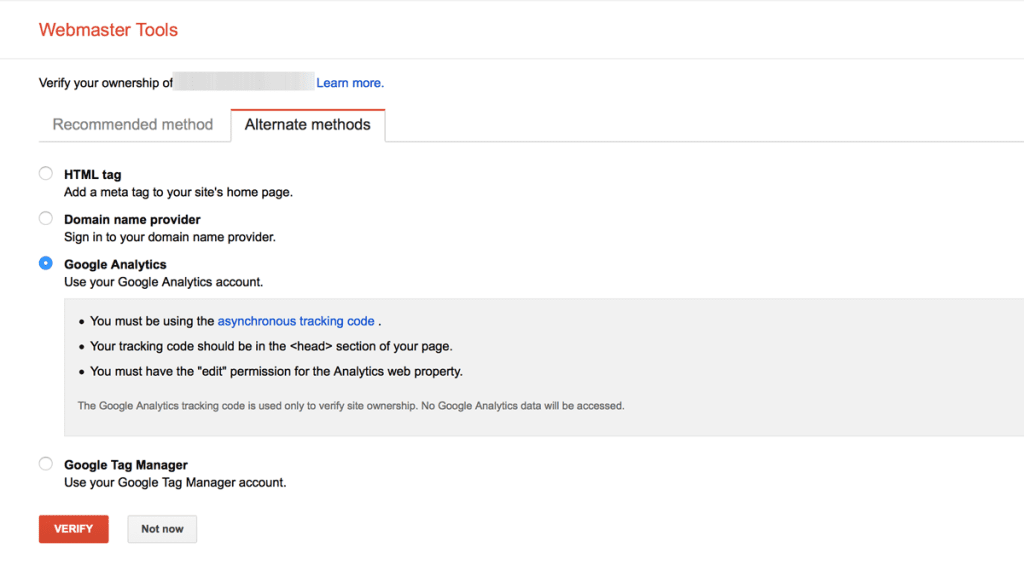
The easiest way - assuming that you have already added the Google Analytics tracking code to your blog - is to click on "Alternate Methods" and then click on, "Google Analytics". At the bottom - you can now click the red button that says, "Verify". This also kills 2 birds with one stone by linking your Google Analytics account to your Google Webmaster Tools account.

Step 3. Add your sitemap
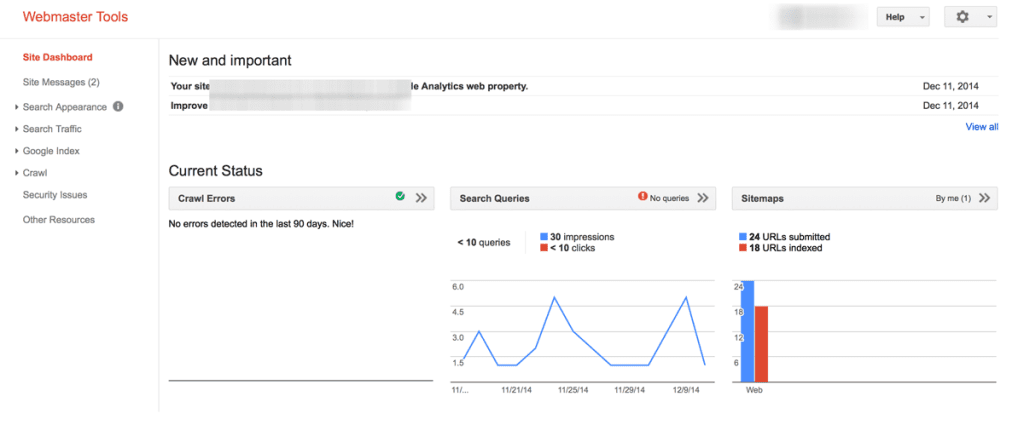
OK - the final thing you want to do when you are setting up your Webmaster Tools account, is to add your sitemap. Basically a sitemap is a file that tells Google what pages are most important and how they are all connected to each other. Google will still crawl your site if you don't upload a sitemap - but it makes it much easier for Google to know what's going on. You can literally think of it as a map of your site (clever huh?) so that Google can quickly and easily figure out what page leads to what page.Click on the "Sitemaps" button - then click on the red button that says, "add/test sitemap". Most sitemaps are going to be located at yourwebsite.com/SITEMAP.XML - but double check in case yours is somewhere else. If you aren't sure whether or not you even have a sitemap, and you are using Wordpress, then install the plugin called, "Google XML Sitemaps" located here: https://wordpress.org/plugins/google-sitemap-generator/

After you've added your sitemap - click "submit". Nice work!


%201.png)